Thursday, September 30, 2010

Apple-Butternut Squash Soup

I'm so happy it's finally Fall!  Fall in Seattle is absolutely beautiful, unfortunately it only lasts for a few weeks (we really only have the rainy season for 8 months and the sun for 4 months . . . nothing in between).  The color of the leaves are extremely vibrant, and set against the blue water of the bay and the lake, there's nowhere I'd rather be.


So, I've been waiting and waiting and WAITING for pumpkins to show up in the markets and grocery stores, but I finally caved when I realized Butternut Squash was available.  Oh Butternut Squash.  I definitely had a HUGE mishap a few years ago when I tried to make a soup with it (my poor parents were the taste testers), so I've stayed away from it for a while.  It must have been the amazing mood the sun put me in yesterday, but I decided that it was time to conquer the squash.


Lucky for me, two of my closest friends (one of which I hadn't seen in a few months) said they'd come over for dinner {little did they know about my prior mis-hap}.  The soup ended up turning out great and my previous squash soup disaster was never mentioned.  It's great how food can bring people together sometimes, and it's just amazing how you can pick up old friendships exactly where they left off.  :)


{Recipe}Apple-Butternut Squash Soup
Ingredients:
   * 3 tblsp unsalted butter
   * 1 medium onion, diced
   * 1 2lb. butternut squash; peeled, seeded and diced (1" squares)
   * 4 golden delicious (or green apples); diced
   * 2 tsp coarse salt
   * 1/4 tsp ground coriander 
   * 1/4 tsp ground ginger
   * 1/4 tsp pumpkin spice
   * 1/4 tsp cayenne pepper
   * 3 cups chicken broth
   * 1 cup water

1.) Melt 1 tblsp butter in a large saucepan over medium heat.  Add onion.  Cook onion, stirring occasionally until butter is melted.  Cook onion until it begins to soften (a couple of minutes).  Add in squash and 1 tblsp. butter and cook, for about 10 minutes.  Stir squash occasionally.

 2.) Add apples, salt, coriander, ginger, cayenne pepper, pumpkin spice, and chicken broth to the squash mixture.  Bring to a boil.  Lower temperature to Low and simmer until vegetables become soft (about 30 minutes).

3.) Once vegetables are soft, pour mixture into a food processor.  Process until mixture becomes a smooth texture, and return to saucepan (you may need to do this using two saucepans if you are making a large quantity of soup or have a small blender/food processor).

4.) Top with sour cream (if you choose), and enjoy!!!


Fall Apple-Butternut Squash Soup on Foodista

Sunday, September 19, 2010

Homemade Doughnuts


YUM!!!  I posted a little while back about wanting to make doughnuts, and I FINALLY did so today.  I've had the little doughnut tins for a couple of weeks now, but just never got around to actually making them.  I personally really like these doughnuts because they are baked instead of deep fried, so you don't feel quite so guilty when you have two . . . or three . . .or four.

And come on, who can really resist fresh made doughnuts whether they're deep-fried or not?!

I definitely filled the doughnut cups up too high and ended up only getting a hole on one side (whoops!).  But nevertheless, all 24 doughnuts are gone (thankfully we had people over watching Sunday Night Football) and everyone said they turned out great.  I also dusted cinnamon over the top of half of the doughnuts for some added flavor. 


The recipe I used for these was actually on the back of the tin, along with a frosting recipe that I slightly altered.

{Recipe} Homemade Donuts
   * 1 1/4 cups cake flour, sifted
   * 1/2 cup granulated sugar
   * 1 1/4 tsp baking powder
   * 1/8 tsp ground nutmeg
   * 3/4 tsp salt
   * 1/2 cup buttermilk
   * 1 egg, lightly beaten,
   * 1 1/2 tbslp butter, melted

1.) Preheat oven to 435 degrees. 

2.) In a large mixing bowl, sift together flour, sugar, baking powder, nutmeg, and salt.  Add buttermilk, egg, and butter and stir until just combined.  Fill each doughnut cup approximately 1/2 full.

3.) Bake 4-6 minutes or until the top of the doughnuts spring back when touched.  Let cool in pan for 4-5 minutes before removing.  Finish the doughnuts with glaze or sprinkles.


{Recipe} Vanilla-Lemon Glaze
   * 1 cup confectioners' sugar
   * 2 tblsp milk
   * 1/2 tsp vanilla extract
   * 1 tbls lemon juice

In a small bowl, stir together sugar, milk, vanilla extract and lemon until sugar is completely dissolved.  Use immediately to glaze doughnuts.

Miso & Ginger Flank Steak

Geez, I can't believe it's been 4 days since I've been able to update my blog!  I've been running around like crazy and am trying to take some time to catch up.  Last Thursday was another late night at work and I didn't want to be in the kitchen all night.  I ran to the grocery store and grabbed some miso and flank steak and realized I was also going to need a glass of wine.  :)

My little brother is staying with use right now and I knew that miso steak was going to be out of his comfort zone (he's never had anything with miso in it before), but he ate a ton of the steak and actually liked it!  I had to call my mom and let her know and she couldn't believe it either.  His picky ways are changing . . . maybe he'll end up becoming a foodie as well!! 

This recipe is very easy to make and extremely simple.  It's a great preparation for flank steak and can be made in under an hour (including the time spent marinating) which is ideal for a busy week night.  I hope you enjoy this as much as we did.

{Recipe} Miso-Ginger Flank Steak
   * 2 Tblsp miso paste
   * 1 Tbls ginger, grated
   * 1/4 cup sesame oil
   * 1/4 cup soy sauce
   * 1 1/2 lbs flank steak

1.) Combine miso paste, ginger, sesame oil and soy sauce in a bowl and mix together.  

2.) Rub mixture onto both sides of steak and place in a plastic bag.  Place steak in the refrigerator and allow to marinate for 30 min.

3.) Remove steak from plastic bag and grill to your liking.  If it is cold or raining out (as it has been here lately), you can pan sear the steak with a little sesame oil on the bottom of the pan.


Roasted Vegetables, Potatoes and Eggs


Ahhh, the weekend.  It's Sunday night now, but I had a great weekend full of friends and family.  On Saturday we had people over at our house to watch the UW Huskies game and have some breakfast.  Cooking for a group of 10, I decided to make something less time-consuming so I would be able to hang out with everyone.  Blake ran down the store and picked up some fresh vegetables and potatoes for me and I decided to do a roasted vegetable scramble.

The game went horrible for us (56-21), but breakfast was fun!  The boys are extreme football fans (due to the amount of Fantasy Leagues they play in), but this allowed us girls catch up and talk about "girl things".  And when I say extreme, I'm not kidding around.  It's 6:45pm and ESPN and NBC have been on in our home since 9:00am . . . oh Sunday Night Football.  Although, I can't complain.  This did allow me to get all kinds of cooking done today.  :)
 

{Recipe} Roasted Vegetables, Potatoes and Eggs
   * Mini sweet pepper (you can also substitute bell peppers)
   * Asparagus
   * Red mini potatoes
   * 1 cup of olive oil
   * Eggs
   * 1 sprig of rosemary
   * Parmesan cheese
   * Salt and pepper to taste

I didn't specify the amount of ingredients for this recipe because it depends on how many people you're feeding as well as how many veggies you like in your eggs.

1.)  Preheat oven to 350 degrees.  Dice up asparagus, and potatoes.  Slice mini peppers into 1/8 inch slivers.  Finely chop up rosemary.

2.) Toss potatoes in a bowl with 1/2 cup olive oil and rosemary.  Lay out on a baking sheet and put into oven.

3.) Toss asparagus and peppers in a bowl with 1/2 cup of olive oil.  Place asparagus and peppers on a baking and sheet and add to the oven.  Bake for 40 minutes.  Make sure the potatoes are cooked completely through before you remove them from the oven (about 40 minutes as well).

2.) Scramble eggs and add cheese.  Fold in vegetables with eggs and enjoy.

Wednesday, September 15, 2010

Simple Chicken Tortilla Soup

Since we got home from California (for my sister's wedding), my boyfriend has been feeling a little under the weather.  He decided that he wanted to make some tortilla soup for dinner and I wasn't going to stand in his way.  So while I was on one side of the kitchen baking muffins, he went to town on the soup.

(Homemade tortilla strips)

Chicken tortilla soup is by far the soup that is made the most in our home during the cold Fall and Winter months.  I don't know whether it's the spice or the heartiness of the soup that does it for us (probably a combination of both), but we seem to make this monthly.  And you really can't go wrong when you're able to make something that tastes so good and remains healthy!


As I've said, we make this soup A LOT, so we've had a ton of time to get it *just perfect* for us.  Grilled corn (my addition), plus the eventual food processing of the entire soup (Blake's idea), leaves you with a hearty and filling dinner. 

(Avocado adds a nice cool and creamy touch to the soup)

I hope you all enjoy this soup as much as we do!  Please let me know how yours turns out (if you try the recipe) and if you come up with any other additions that might make this better. :)


{Recipe} Simple Chicken Tortilla Soup
Ingredients:
   * 2 chicken breasts
   * 1 16 oz. box chicken stock
    * 2 ears of corn
   * 1 large yellow onion, diced
   * 1 clove garlic, minced 
   * 1 14.5 oz can of diced tomatoes 
   * 1/2 tsp cumin
   * 1/4 tsp chili powder
   * 1/2 cup cheese (we like cotija, but feel free to use cheddar or jack for a stronger flavor)
  
Garnishes:
   * 1 avocado
   * A few sprigs of fresh cilantro
   * Homemade tortilla strips


1.) Cut up raw chicken into 1 inch squares

2.) In the bottom of a large pot, combine chicken and 2 cups of chicken stock.  Bring to a medium heat and allow chicken to cook (about 15 min)

3.) While chicken is cooking, grill the corn (adds a much better flavor - you can also do this before you start the chicken), dice up the onion and mince the garlic
  
4.) Add the rest of the chicken stock and diced tomatoes (including the liquid in the can), onion, garlic, cumin, and chili powder to the pot, and bring back to a medium heat

5.) Cut off corn kernels and add to the pot.  Let everything cook for about 30 minutes over medium to medium-high heat.  This will allow the soup to thicken.

6.) You can enjoy the soup "as is" at this point, or you can put it all in a food processor (or blender if you don't have one) and then serve.  

7.) Don't forget to add the garnishes!! You can use any, all, or none of the garnishes, it depends on your personal food preferences.


{Recipe} Homemade Tortilla Strips
Ingredients:
   * 4 corn tortillas
   * 1/2 cup grape seed oil (or you can substitute corn oil)


1.) Cut up tortillas in into thins strips about 1/4 inch think

2.) In a medium frying pan, add grape seed oil and bring to a medium heat.  You MUST use an oil with a high smoke/burning point so that the tortilla strips don't burn.

3.) Add in tortilla strips and wait until they are bubbling vigorously.  At this point, turn over and cook the other side
4.) Remove from heat and add to soup! :)


Tuesday, September 14, 2010

Whole Wheat High-Fiber Applesauce Muffins

I went to work this morning absolutely STARVING.  I keep some cereal at my desk, but definitely wanted/needed something more today.  It's always a struggle to run down to the coffee shop and find something healthy (I mean come one, we're talking about pastries here), so I decided when I got home today that I would make some muffins to bring into work with me for the rest of the week.  Of course this is my goal, but things change quickly around our house and food disappears fast.

 {Yes, that is a cinnamon stick}

Luckily my boyfriend's dad, Steve-O, loves to cook, and he sent me this recipe back in February.  I must give credit where credit is due, so Steve if you're reading this, thanks for the recipe.  I can't believe that I still have it in my inbox, let alone that I haven't even made these yet!  Somewhere in the back of my mind I must have known that I needed to have these around the house and stored the recipe away in a mental "do not delete" folder.  I've tried the muffins before when we've gone to visit, so I can tell you that they are an amazing substitute to the "healthy" breakfasts served at mainstream coffee houses.


The muffins came out of the oven and they filled our kitchen with the smell of cinnamon and apple (which was hard to do considering my boyfriend was making Chicken Tortilla Soup - I will post pictures and recipe later).  The smell brought me straight into fall and made me want to bundle up in a sweater and make a fresh-brewed cup of coffee.  Our summer has been pretty awful here in Seattle this year, so it's no surprise that fall may already be upon us (think pumpkin waffles, butternut squash soup, apple pie . . . yum).


These muffins are PACKED with fiber, so I definitely won't be going hungry anytime before lunch.  Not being hungry at work is key when you can't get away from your desk (ex: being stuck on long conference calls - especially early in the morning).
**I'm just keeping my fingers crossed that they will last me even until Friday!!**

{Recipe} Steve-O's Whole Wheat High-Fiber Applesauce Muffins
Ingredients:  
   * 2 1/2 cups whole wheat flour
   * 2 tsp baking powder
   * 1/4 tsp baking soda
   * 1/4 tsp salt
   * 1/4 cup unsalted butter, melted
   * 1 cup unsweetened applesauce
   * 3 Tblsp fiber (powdered fiber)
   * 1 cup Splenda brown sugar
   * 1 egg, beaten
   * 1/2 cup buttermilk
   * 1 tsp vanilla
   * 1/4 tsp cinnamon
   * 1/8 tsp powdered ginger


1.) Preheat oven to 375 and grease 12-cup muffin tin or fill with muffin liners

2.) In a large bowl, mix together the following ingredients: flour, baking powder, baking soda, and salt

3.) In another bowl, whisk together melted butter, applesauce, fiber, brown sugar, egg, buttermilk, vanilla, cinnamon and ginger

4.) Fold wet mixture into dry mixture and stir until just combined.  The batter will be very thick, but that is how it's supposed to be.


5.) Fill muffin tins or liners; bake for about 15 - 20 minutes or until muffins are puffed up and turning golden brown on top.  You can double check by sticking a toothpick in the center of a muffin, if it comes out with nothing on it, then it is done.  Serve warm if possible (even if that means re-heating once you get to work).  ;)

Yield: 12 muffins


Whole Wheat High-Fiber Applesauce Muffins on Foodista

Monday, September 13, 2010

Quick Monday Night Dinner

I've been out of town for the past week, so I haven't had a chance to cook or post anything new.  Fortunately, it was for a GREAT reason.  MY SISTER WAS GETTING MARRIED (and I had to be out of town for work for a few days as well).  The wedding was a beautiful laid back setting on the beach, followed by an afternoon at the theme park with extreme roller coasters, and finished off with a nice dinner and of course, a wedding cake (pictures to follow).  I will be sure to post more on this event (I need to make sure I do the pictures justice), but for now - a quick Monday night dinner.

I got home late tonight, and still have a bunch of work to complete, so when I headed to the store I knew I had to make something that was going to be quick and easy, and of course taste great.  I decided on a little Mexican spice and a salad.  I ended up making a cayenne-spiced chicken breast topped with queso fresco, avocado {one of my favorite things} and lime.


 {The Dish}

I'm a pretty big wuss when it comes to hot and/or spicy food, yet I love them both (an oxymoron perhaps?).  This is why I topped the chicken with some avocado - it was a cool, subtle flavor that smoothed out the overall dish.


To go with the chicken, I made a white bean salad tossed with grape tomatoes, red onion, scallions, and lemon.  Of course I needed something sweet to go with my dinner as well, so I sliced up a fresh nectarine (I'm bummed they are almost out of season).  :(

{White Bean Salad}


The meal turned out great, and it only took me 50 minutes to prepare, take photos, eat, and clean up!  You really can't beat that when you don't have much time to spare. :)

{Recipe} Cayenne Spiced Chicken Breast
Ingredients:
   * 2 chicken breasts
   * 1 tblsp Cayenne Pepper (although you may not want to use all of this)
   * 1/4 cup Olive Oil
   * Salt and Pepper to taste
   * 1 medium size Avocado
   * 1 Lime

1.) Butterfly both chicken breasts.  Lightly sprinkle salt, pepper and cayenne pepper over both sides of the chicken breasts.  With the cayenne pepper, be VERY CAREFUL to just lightly brush over the chicken.  Unless you REALLY like your food hot, you don't want to over-do this.

2.) Layer the bottom of a frying pan with the olive oil and also squeeze the juice from the lime into the pan.  Place each chicken breast in the pan and bring to medium-high heat.

3.) Cook the chicken for 7-8 minutes on each side so that the chicken cooks through, but also remains moist.

4.) While chicken is cooking, dice the avocado and crumble the queso fresco. 

5.) Remove chicken from heat, add avocado and queso fresco.  ENJOY!!!


{Recipe} White Bean Salad
Ingredients:
   * 1 can of White Beans
   * 1 bunch Scallions
   * 1 cup Cherry Tomatoes
   * 1 lemon
   * 1/4 cup Olive Oil

1.) Drain excess water from beans and rinse thoroughly under cold water.  Allow beans to dry (2-3 minutes).

2.) Cut cherry tomatoes in half and dice scallions

3.) In a small-medium sized bowl, combine white beans, cherry tomatoes, scallions, and olive oil.  Lastly, squeeze lemon over the top of ingredients.

4.) Lightly toss or stir ingredients to blend together and . . . ENJOY!!!

Thursday, September 9, 2010

It's a {Vietnamese} Labor Day Lunch

Photos by {Me}

So, I know that I'm a little late in posting this, but I've been traveling for work all week and haven't had a chance to put the picture up yet.  On Labor Day we had my family over for lunch and decided to do a little Vietnamese vermicelli noodle bowl with lemongrass chicken.  My boyfriend made some imperial rolls (pork, ginger, garlic, and sesame oil ground into a paste and then rolled in rice papers and deep fried . . . YUM), and I made lemongrass chicken with shitake mushrooms.  Everything came together nicely and my family was impressed with our Asian inspired lunch.  As always, it's great when food brings you closer to those who matter the most.  :)


Tuesday, September 7, 2010

Chocolate Chip Love

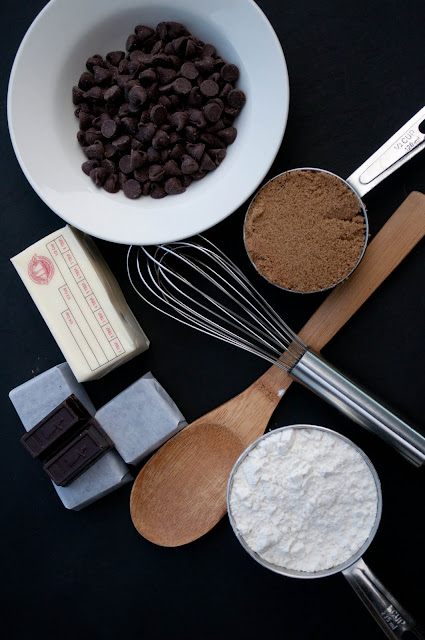
Wow.  I was searching through some of my favorite blogs last week and stumbled upon this recipe from Love & Olive Oil.  I wasn't looking for treats to make or anything, but when I saw the pictures I knew I had to try them.  For me, cookie dough is MUCH better than cookies and this recipe was perfect.

My boyfriend and I had {another} Italian dinner party this weekend and I thought these would be a great little dessert after a heavy meal.  Dinner consisted of meatball sandwiches, risotto cakes, salad, asparagus with bacon and eggs, and dates stuffed with toasted pine nuts and a red wine reduction.  To say the least, everyone was STUFFED after dinner, but still made room for a little dessert.  The chocolate chip cookie dough truffles were a huge hit.  A few of these little treats are (luckily) still in my refrigerator and I can't wait to have another one after dinner tonight.

{The Ingredients}


{The Dessert}


Enjoy!  You know we all did. ;)


{Recipe} Chocolate Chip Cookie Dough Truffles
Note: This recipe was found on www.loveandoliveoil.com
Makes approx. 3-4 dozen.

Ingredients:
   * 1 cup (2 sticks) butter or margarine, room temperature
   * 3/4 cup granulated sugar
   * 3/4 cup packed brown sugar
   * 1/3 cup milk or soy milk
   * 1 teaspoon vanilla
   * 2 1/2 cups all purpose flour
   * 1/4 teaspoon baking soda
   * 1 teaspoon salt
   * 1 cup mini semi-sweet chocolate chips
   * 14 oz dark chocolate candy coating


1.) Beat butter and sugars and in large bowl with electric mixer on medium speed until light and fluffy. Add milk and vanilla. Stir in flour, baking soda and salt and mix on low speed (or by hand) until incorporated. Stir in chocolate chips.

2.) Cover and chill dough for 1 hour.

3.) When dough is firm enough to handle (it may help to lightly flour your hands), form dough into 1″ balls and arrange on a baking sheet lined with waxed paper. Place sheets in freezer and let chill for 30 minutes.

4.) Melt chocolate candy coating in a double boiler or in microwave according to package directions. Using forks or a dipping tool, dip cookie balls into candy coating to cover. Tap fork on side of pan to remove any excess coating, and return to waxed paper-lined baking sheets. Chill until set. Store, chilled, in an airtight container for up to 1 week (though good luck making them last that long).

Friday, September 3, 2010

Lemon-Blueberry Sorbet

A refreshing {end-of-summer} summer treat!!!


Photos by {me}

I made this sorbet last weekend and wanted to share a pitcure.  It's an extremely refreshing sorbet and something everyone who like to use their ice cream maker should try!

Have a great Labor Day Weekend!

{Recipe} Lemon-Blueberry Sorbet
Ingredients:
   * 6 cups fresh blueberries
   * 3 lemons
   * 1/2 cup sugar
   * 1/2 cup water

1.) In a medium size saucepan, add a tiny amount of water and blueberries to cover the bottom.  Let simmer over medium heat until the blueberries begin to burst.  Using a potato masher (or spoon if you don't have one), mash up all of the blueberries in the pan to get the juice out.

2.) Strain blueberry juice into a large bowl.  Continue to follow step one, exculding any more lemons, until all of the blueberries have been juiced.  Then place the bowl of juice into the fridge.

3.) In another saucepan, make a simple syrup by combining the sugar and water.  Stir sugar until dissolved.    Add the simple syrup to the blueberry juice in the fridge.  Let mixture sit for at least an hour and a half to allow it to get cold before placing it in your ice cream maker.

Lemon-Blueberry Sorbet on Foodista

It's a meat{turkey}ball!

Last night was book club (a few girlfriends and I use this as an excuse to get together, drink wine, and chat) and I brought turkey meatballs with marinara sauce.  I've never made meatballs with turkey before, so I was expecting them to come out much more dry than regular meatballs.  To my surprise, they turned out great!  The girls in book club all seemed to enjoy them and my boyfriend ate the leftovers this morning for breakfast. :)

Yummm, who can resist wine and cheese?!

In book club, we all bring a dish to share with everyone.  We had a fabulous Italian meat and cheese plate, gnocchi in tomato sauce, and a chilled cheese tortellini salad with mozzarella and basil (you can see these in my pictures below).  In all, it was a fun night with the girls and we had some great food and wine.


Photos by {me}


{Recipe} Turkey Meatballs
   * 2 lbs ground turkey
   * 1/2 cup olive oil
   * 1 egg
   * 1 garlic clove - minced
   * 1 tblsp. dried oregano
   * 1 tblsp. dried basil
***Note:  I do not actually measure when I am cooking (except for baking of course).  The ingredient measurements are all a close estimate to what I used***

1.) In a large bowl mix with a wooden spoon: ground turkey, olive oil, garlic, and a slightly beaten egg.  The egg and olive oil are what hold the shape of the meatball
2.) Stir in the oregano and basil
3.) Roll mixture into 1" balls and place on a cooking sheet covered with wax or parchment paper

You can either put the rolled balls into the freezer and save for up to 3 days, or cook them.  I like to bake the meatballs because it is healthier than frying them.  To do this, pre-set the oven to 350 before making the meatballs.  Once you are ready, put the meatballs in the over for roughly 30 min (until the tops are brown).


{Recipe} Marina Sauce
   * 2 small onions
   * 2 carrots
   * 2 celery sticks
   * 1/2 cup olive oil
   * 1 large garlic clove
   * 2 28 oz. cans of peeled, whole San Marzano tomatoes

1.) Dice onions, carrots, celery
2.) In a large pot, add olive oil, onions, carrots, and celery.  Mince garlic and add to pot.  Saute the ingredients for about 20 minutes on medium-low to sweeten.
3.)  Add tomatoes and juices from the can to the pot and stir over medium.  Keep the sauce over medium for another 20 minutes or so.
4.)  Remove sauce from heat and blend together in either a blender or food processor
5.) Add salt and pepper to taste

Wednesday, September 1, 2010

Little Treats

With Labor Day coming up this weekend, does that mean I have an extra day to throw a party and cook?!  I think it does. ;)

While perusing through one of my favorite cooking stores on-line today, Sur la Table, I found what may be one of the best things for baking I've seen in a while.  When making bread (zucchini bread, banana bread, etc.) to give to friends, it's always difficult to find some sort of packaging that will protect your loaf and is pretty.  Enter the Paper-Loaf Pans here.  These little paper molds are grease-proof and oven-proof, so you can actually BAKE YOUR BREAD in them.  And as an added bonus, they look great!  Just add a cellophane bag around it and a cute bow.


I also ran across some inspiration for my weekend baking . . . mini doughnut trays!  This will be my first attempt at donuts, so wish me luck.  It's time to start gathering recipes and understanding how these little guys are made!  Old-Fashioned Glazed anyone?


On another note - Happy Hump Day everyone! :)